
Data Exchange
Many of our products involve Live Data packaging and shipping data to you behind the scenes (as opposed to through our UI and API). This page provides an overview of the data exchange process and common/suggested configurations.
Live Data offers multiple methods for transferring data to our customers. In order of preference, they are:
- Into an S3 bucket in your AWS account
- Into an S3 bucket in our AWS account
- Via SFTP from a server hosted in our account
The benefits of this approach are:
- Follows AWS best practices for security
- No need to exchange AWS credentials
- You control the data once it’s in your account
- You can trigger automation/processes more easily
To set this up, you need to grant Live Data cross-account access to a specific bucket and/or folder in your account. There are a couple of AWS documentation pages that might help for additional details, but this page also provides an overview of the process. AWS docs include:
The basic steps are:
- Decide on a bucket and/or folder in your account that you want Live Data to have access to
- Create an IAM role in your account that grants access to that bucket/folder
- Send the ARN of that role to Live Data support
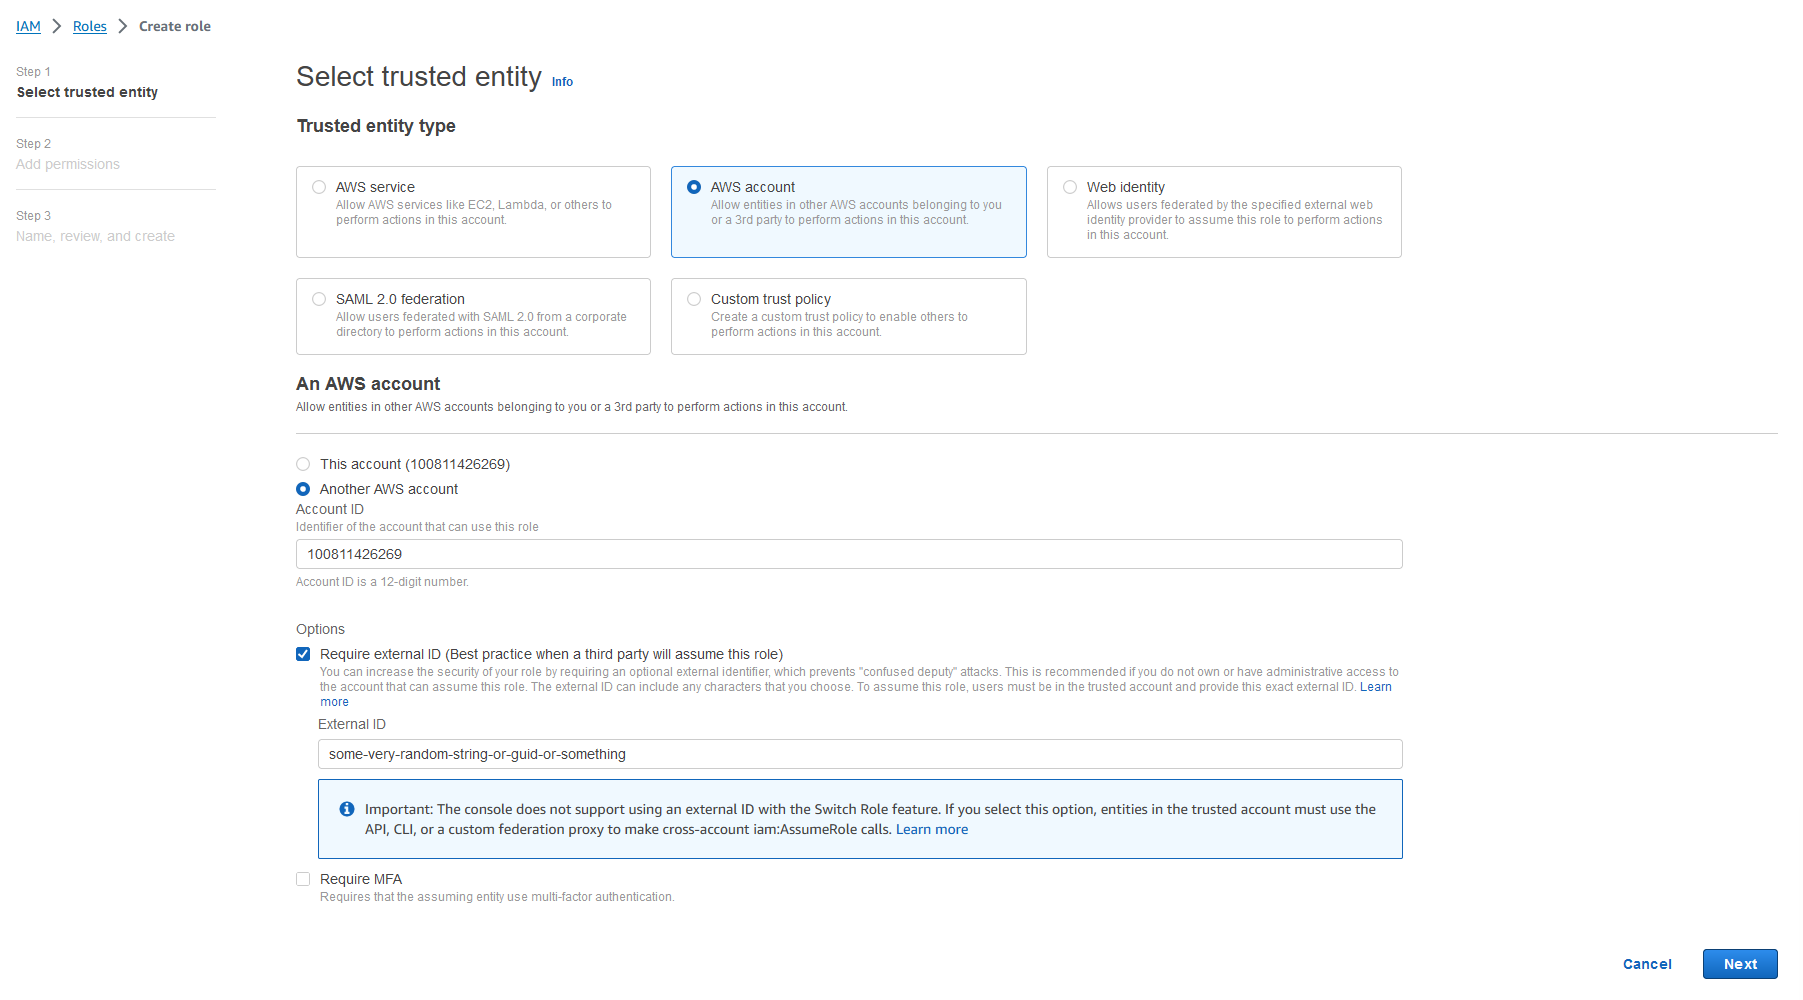
When creating the cross account role, you will need the Live Data AWS account ID, which is: 100811426269. Also, be sure to set an External ID (you can use a random string) for additional security.
In the IAM page, create a Role, select AWS Account under Trusted Entity Type, select Another AWS account, enter Live Data’s account ID (100811426269), check the Require external ID box, and enter a random string for the External ID, and hit Next.
You can either select a policy that you already have, or click on Create Policy to create a new policy. As an example, below is a policy template that you can use to customize the specific access you want to grant. The below policy limits access only to a specific folder within the bucket – that is optional. If you want to just provide access to the entire bucket, remove the Condition clause from the first statement and the <folder> from the Resource in the 2nd statement.
{
    "Version": "2012-10-17",
    "Statement": [
        {
            "Effect": "Allow",
            "Action": [
                "s3:ListBucket"
            ],
            "Resource": [
                "arn:aws:s3:::<bucket_name>"
            ],
            "Condition": {
                "StringLike": {
                    "s3:prefix": [
                        "<folder>/*"
                    ]
                }
            }
        },
        {
            "Effect": "Allow",
            "Action": [
                "s3:GetObject",
                "s3:PutObject",
                "s3:ListObjects"
            ],
            "Resource": [
                "arn:aws:s3:::<bucket_name>/<folder>/*"
            ]
        }
    ]
}
Finish the wizard by creating the role. Once completed, View the role and copy the ARN value. Send Live Data the following information to complete the configuration:
- the role ARN
- the External ID
- the bucket name/path
If you prefer that we host the data in our S3 account, that works as well. We will create a bucket and folder for you and provide you either an IAM role or AWS credentials to access the data. Contact us to configure this setup.
If you prefer to receive the data via SFTP, we can host a server in our account and provide you credentials to access the data. We will provide you with a private key that you can use to authenticate to our server. Contact us to configure this setup.